MSA Analysis techniques and Workflow
Some experts define quality as the ability to meet customer expectations. Some other go a little beyond and say that quality is the ability to exceed the customer expectations and to aim for his complete satisfaction.
In either case, the specified requirements in the product or service must be always met. How do we do that? Deming would immediately say that the quality circle (PDCA) must be implemented across all functions and processes of the company. And to a certain extent, I agree. In Quality there are many great tools to keep everything under “control” and prevent problems.
But if we focused on the realization process and final product (or service), we would need to make sure that all characteristics of the product and process parameters comply to the specification either through “measurements”, “tests” or a combination of both. This highlights the importance of the “measurements”.
When we measure we have to use adequate measurement systems in order to make good decisions. The MSA helps us assess how good a measurement system is and how reliable the measurements are. For this, the MSA offers many analysis techniques even if many persons believe that the GR&R is the only one. As best practice and to really ensure that your systems are OK some of the MSA techniques MUST ALWAYS be used in the right sequence. Why? Let’s see an example.
You work for a company which produces plastic components for the cockpit and they must comply to tight dimensional tolerances. In your project for a new car and as part of the APQP you need to sent evidence of the capability of the measurement system. The quality engineer in your company organizes a GR&R and is extremely happy with a result of 10%. Great! But your PPAP gets rejected because all parts are out of spec. How can that happen? As root cause you discover that the measuring device used for the GR&R needed adjustment….. the calibration was due. At calibration you discover that adjustment is required because the device has a huge BIAS exactly in the range required!!!! With a new calibrated and released device you checked PPAP parts and you confirm they are out of spec.
You might think that my example is silly and nobody can ever make such a mistake. Unfortunately nonconformities due to problems with the measurement system are in the top 10 (ISO9001 and IATF16949) As reference you can read the following statement of the certification body ASR about the most common ISO9001 nc’s:
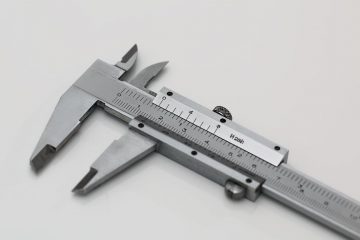
“… in 4th place is …. Section 7 – auditors found some measurement devices inaccurate for the measurement being conducted. Example might be using a ruler rather than calipers. Auditors also wrote findings for failed internal calibration systems. 2015 didn’t change the intent of calibration, but did change some language.” Read the complete report of ASR here.
So, what can we do to avoid the problem of the example?
We can properly use the right MSA tools in the right sequence & at the right time.
Sequence of MSA techniques
Let’s start with the tools and the sequence:
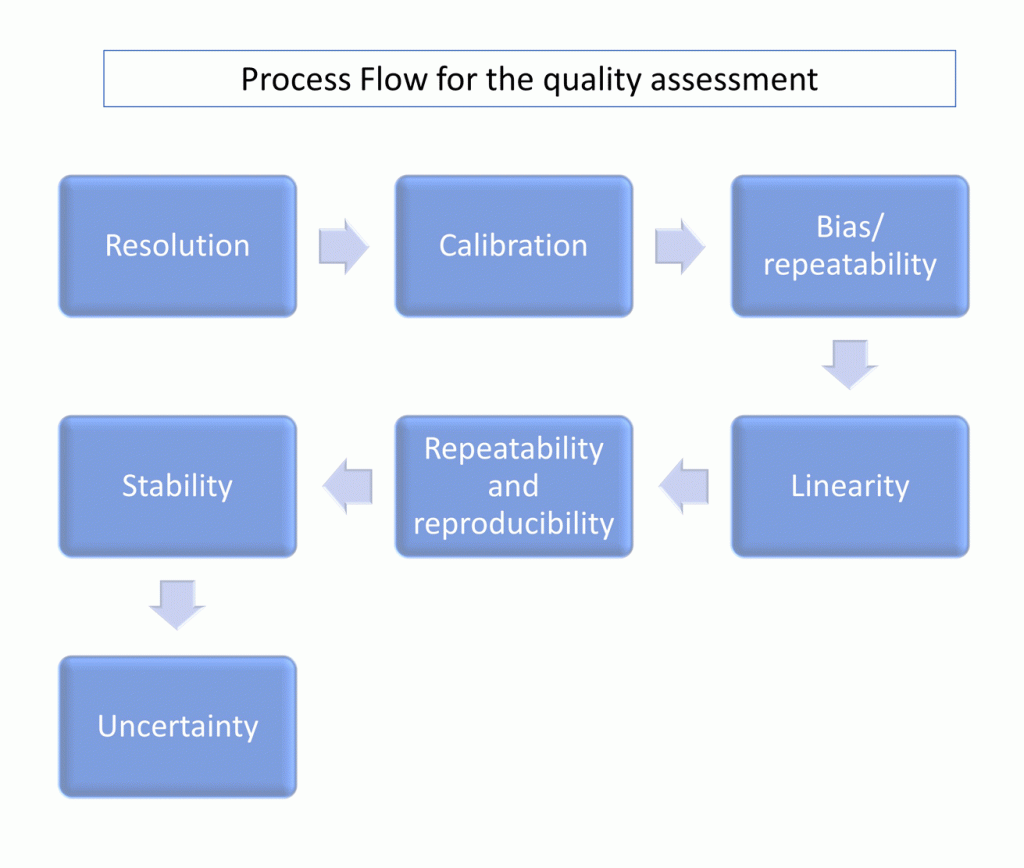
You can think of the sequence as a logical chain of if-statements. If … and only if…
Only if the first step is OK you will move the next and this applies for every step.
Concepts
As quick reference:
Resolution: The gage resolution must be enough for the purpose (10% as per AIAG or 5% as per VDA5).
Calibration: The gage must be calibrated in the range in which it will be used, the calibration result must be OK & the report valid (provided by a company/laboratory certified in ISO17025). In must cases a BIAS and linearity analysis are performed as elements of the calibration if required.
Bias: EV<10% , bias should not reach or impair the resolution level. Hypothesis test must be accepted (AIAG) or C g∕C gk≥1.33 (VDA5 method 1 or “Verfahren 1”).
company/laboratory certified in ISO17025). In must cases a BIAS and linearity analysis are performed as elements of the calibration if required.
Linearity: Must be OK. Slope 0 or as close as possible and Hypothesis test accepted (AIAG). Slope 1 or as close as possible (standard deviation of bias and evr must be OK -VDA5-).
R&R: Repeatability and reproducibility. GRR < 30% or better (lower of 10% is the target but between 20%-30% might be accepted by the customer -AIAG-). Similar levels are considered by the VDA5 but used in the Capability Assessment (based on Uncertainty).
Stability: Must be OK. Similar to Linearity but referred to evolution in time as change of Bias per period of time.
Uncertainty: Only considered by the VDA5 and includes temperature and extended uncertainty of unknown factors. For complex measurement systems I recommend to perform a complete capability assessment 😉 .
Right tools at the right time.
Similar to the activities in the APQP, the MSA tools can also have an overlap in the timeline when referred to a product, but I could in set as the milestones for the “right time”:
1. Development. In the development stage you can take a look at new devices, state-of-the-art sensors, measurement techniques, etc. but keep in mind the future use, meaning, the adequacy of the system for your purpose. Then, assess the required resolution. If the resolution is OK , proceed to the calibration in the measurement range you need. Note that if the calibration is professionally performed, the Bias, linearity, uncertainty, etc. should be shown in the calibration report as well as the traceable measurement references.
2. PPAP. For the PPAP preparation you need to provide evidence of “Measurement capability”. Start with a check on calibration, bias and linearity. If all are OK, perform the R&R and, for complex systems you should take a look to additional variation sources that could lead to measurement uncertainty (VDA5).
3. Serial production. Knowing that variation is unavoidable…. you need to keep an eye on the measurement systems to guarantee their good performance. You can do this through regular calibration, stability checks and R&R (especially when gages were adjusted or replaced, operators changed, software upgraded, etc.).
Remember that the golden rule of the quality systems is prevention. If you use all the techniques in the right sequence at the right time you minimize the risks of failure and ensure that the decisions you make are based on reliable measurements.
Regards
Miguel Gómez


0 Comments